Showing posts with label cupcakes. Show all posts

Tuesday, March 3, 2015

Little Monster First Birthday

 So I have been meaning to share this birthday party with everyone for a long time. This is my nephew Finn's first birthday. The theme was Little Monster because if you know Finn then you know that theme kind of fits him well. 


So for decor I made some simple decorations to tie in the theme. 


The dessert table featured Finn's little monster cake and build your own monster cupcakes.


All of the cupcakes had "fur" already on them and then the kids got to pick and choose their horns, eyes, teeth, and arms which were all made of chocolate.


The cake itself featured four different monster all causing mischief of some sort.
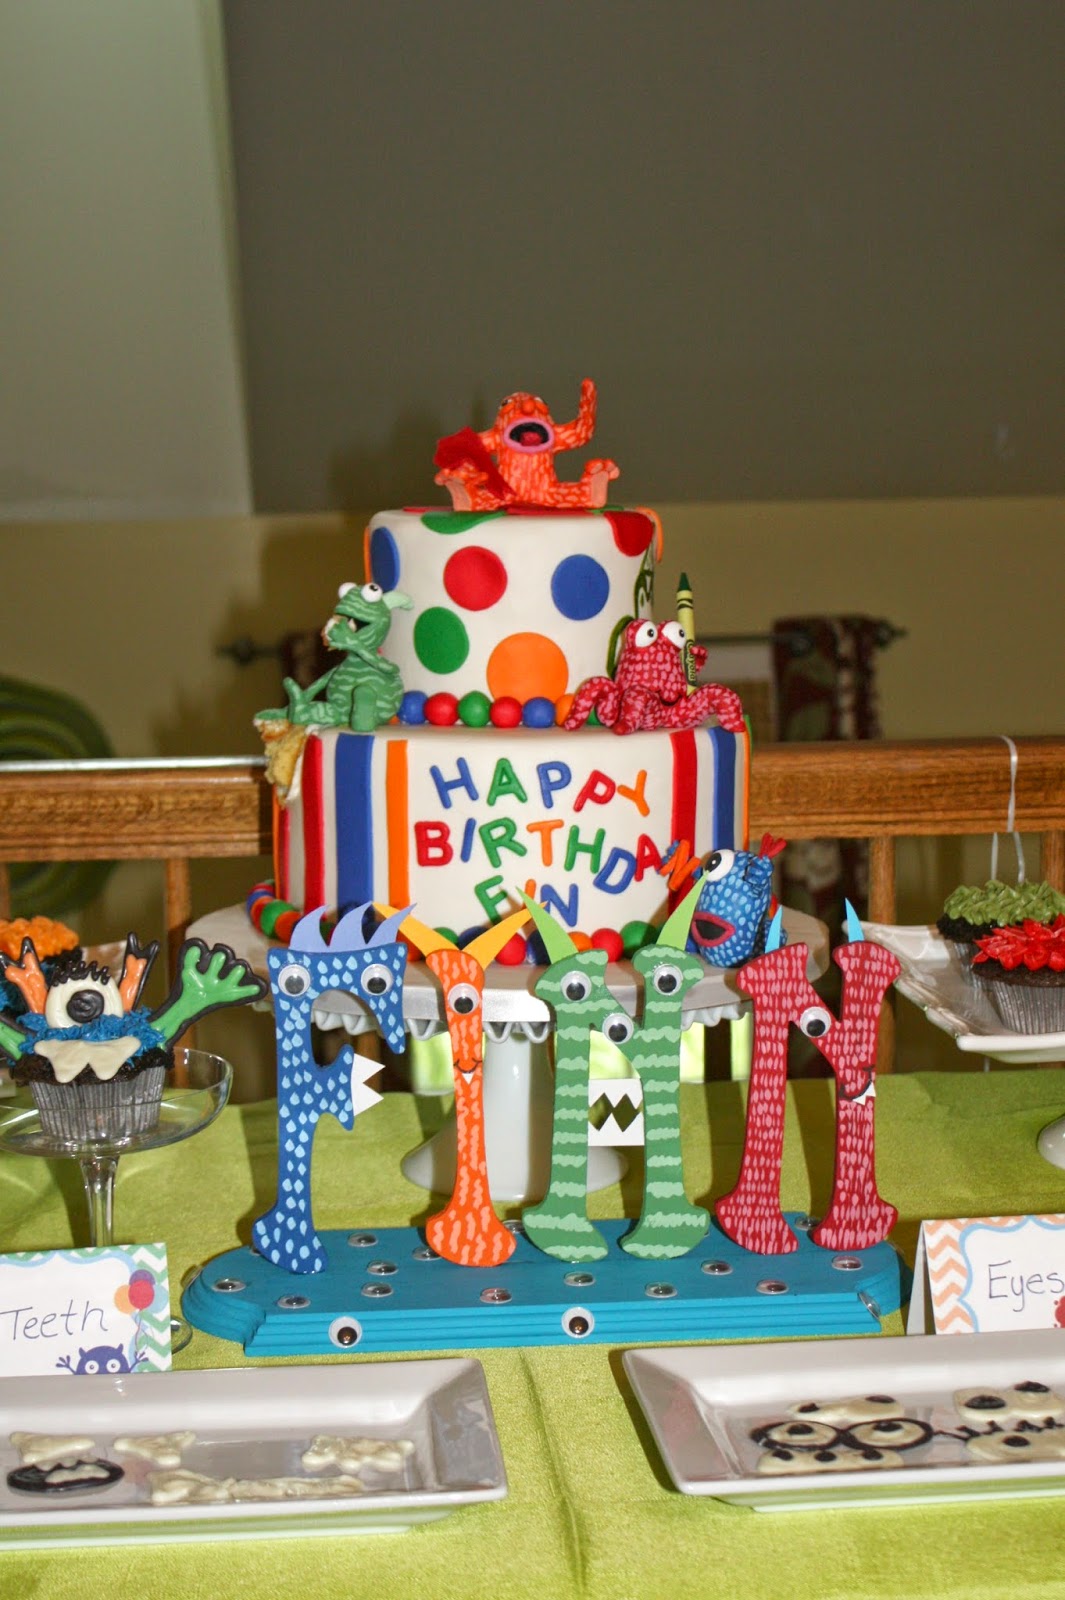

Since I had made Owen his own name plate for his second birthday I had to make Finn one as well. If you would like instructions on how to make your own name plate check out my tutorial. 


The kids had a blast making their own monsters.


And of course Finn had a blast smashing his cake. 


 My awesome friend Janice made little felt monsters for all of the kids to adopt at the end of the party. They were a hit with all of the kids. 


The birthday boy and I. Ha ha love his face in this photo!


I though this was a fun theme for a first birthday! Hope you enjoyed it. I will try to post more this coming year. We have a lot more going on now with the opening of the shop so I should have lots of parties to share with you. 

Monday, May 5, 2014

Mother's Day Cupcake Bouquet Tutorial

With Mother's Day quickly approaching I wanted to share this super sweet and easy cupcake bouquet tutorial that any mother would love! 
So first up you will need the following items to make your cupcake bouquets. 
  • Terracotta pot
  • Acrylic paint
  • Paintbrush
  • Mini cupcakes
  • Toothpicks
  • Styrofoam ball
  • Icing in different colors
  • Piping tips Wilton 2D, Bakery Crafts 68, Wilton 32, Wilton 352
  1. Start by having child(ren) paint a fun design on the pot for their mother. After the pot has dried seal pot with clear acrylic sealer.
  2. After the pot is completely dry insert Styrofoam ball into pot. You want about half the ball to stick out of the pot so you may attach the cupcake flowers.
  3. Ice the cupcakes to look like flowers using assorted tips.
  4. After cupcakes are iced apply cupcakes to Styrofoam ball using toothpicks. You may need to use more than one toothpick per cupcakes. Try to get the cupcakes as close as possible to avoid to many large gaps. 
  5. Use the Wilton 352 leaf tip to fill in any holes between cupcakes and present to Mom!
  6. After the cupcakes are consumed Mom can use the pot for planting her favorite flower (that you also bought her for the occasion)!


  7.  He has no idea what is happening to him!
     My little helper loves to bake!


How to Ice Cupcakes
  • Rose
Start with a piping bag filled with icing color of your choice and the Wilton 2D tip. Start with the tip in the center of the cupcake and apply pressure. Swirl the design outward to complete the rose. 


  • Mum
Start with piping bag filled with icing color of your choice and Bakery craft tip 68. Place tip on the outer edge of the cupcake and apple pressure and pull away to make a petal. Continue around the cupcake to complete one row. Once first row is complete pipe next row directly on top until the entire cupcake is covered in petals. 


  • Ball Flower
Start with piping bag filled with icing color of your choice and Wilton tip 32. Place tip on outer edge of cupcake and apply pressure to make a small dot of icing. Continue applying dots around cupcake until entire cupcake is covered. 


Have fun with this project! If  you do not have certain tips or piping bags don't worry cupcakes do not have to look exactly like a certain flower to look nice.

Monday, December 30, 2013

Top 13 in 2013!

Typically at the end of each year I like to reflect on my favorite cakes from the previous year and share them with you. This year I am going to mix it up a bit and share the most popular post from this year!
 
I had a lot of fun putting together these parties and tutorials to share with all of you. So I hope you have enjoyed them and they have given you some ideas for your own cakes and parties. Thanks for allowing me to share my crazy cake life with all of you and I hope that 2014 brings many many more cakes and parties to share.
 
Here are the 13 most popular posts from 2013!
 

Wednesday, December 11, 2013

Brielle's Pretty and Pink First Birthday

I am so excited to share this pretty pink first birthday dessert table we did for Brielle's first birthday. I usually get to do a lot of boy birthdays so it was fun to make everything pink and girly for a change. The theme was cupcakes and the colors were pink and purple so we made everything super pink and girly. For the dessert table I made chocolate cupcakes, strawberry push pop shooters complete with tutus, strawberry milks with cookies, and rice cereal treats in the shape of cupcakes. We also made the backdrop for the desserts table and all the little tutus for the push pops. I love the way the display turned out and hope I get to make more girl themed dessert tables in the future.
 

Close-up of the little tutus we made for the push pops!


Baby girl getting a sneak peak at the table.


She was intrigued by the cake but was unsure what to do with it.
She ended up just picking off and eating the sprinkles instead of smashing it.

Happy 1st Birthday Brielle! i hope we get to be a part of many many more!