Tuesday, June 28, 2011

Summer Cookout

My husband and I decided to host a summer cookout party this past weekend. We had an awesome time with family and friends, so I thought I would shre some of the details with everyone.

Here is the appetizer spread! Fruit skewers, fresh veggies, and ham and cheese pinwheels.  


We set-up the rest of the food outside! All of the printables came from HWTM so check them out if you are going to host a cookout.

Unfortunately I did not snap any pictures of the food table, but I had it set-up like a build your own burger/ hotdog bar with all the fixings. I also made a pinata for everyone entertainment. It was pretty easy to do, but it was a process over several days!.
I was pretty happy with how it came out!

Finally, on to the desserts! I made my cookout cookies again, cupcake burgers, and stuffed strawberries. I think the stuffed strawberries were a big hit!
Here is a close-up of the cupcake burgers! For full instructions visit bakerella. I wish I had more time to dress my burgers. I wanted to add cheese and lettuce made of fondant. Oh well, there is always next time!
I hope you enjpyed this look at our summer cookout. if you have any fun favorite foods or recipes for cookout please let me know!

Monday, June 20, 2011

Topsy Turvy Wedge Cake Tutorial

I hope you all enjoyed a glimpse into my wedding! Now, I want to show you how I stack my wedding cake to achieve the topsy turvy look. I have already explained how I construct a different type of topsy turvy cake here. For my wedding cake, I used a wedge construction in order to achieve the look I wanted.

First, I iced and fondanted all of the cakes separately and placed each cake on its own acrylic plate. Then I decorated each tier separately before attempting to stack the cake. If you do not have acrylic you can use wood just be sure you have a hole in the center for the center dowel support. (Sorry about the poor quality photo, it was late at night).
Here are some close-ups of the berries and other flowers I made for the cake.


Here is the cake stacked up normally before placing the wedges. Since my cake was fake, and for display purposes only, I can get away with stacking up the cake without any dowels.  
For, the wedges I used green styrofoam that is used for floral arrangements. I cut the styrofoam so that each wedge gave the slant that I wanted. Be aware that a slight slant will be pretty significant when the cake it stacked. If the cake had been real I would recommend covering the styrofoam in plastic wrap or fondant so the styrofoam does not touch the cake. When stacking you want to stack each tier over a center dowel and then be sure to dowel each tier sufficiently. After, you have the wedges in place you can then start placing your flowers between the tiers. If the cake is large you may want to transport it in sections, just make sure that you have enough icing glue to secure the tiers in place on site.


This is of course the finished cake! Since the cake was fake I drove with the cake full assembled to the site of the wedding. Even though the cake was fake it was still a very stressful drive with all of the sugar flowers rattling in the back of the car.
I hope you enjoyed this short tutorial of how to make a wedge style topsy turvy. If you have any questions please feel free to ask.

Monday, June 13, 2011

Sweet Fall Wedding Part 2!

So, now the part everyone has been waiting for...the sweets! I designed a large five tier topsy turvy cake for our wedding cake. I wanted the focus of the cake to be on the sugar flowers, so I kept the tier designs simple and elegant. It turned out exactly as I had hoped! The cake flavors included pumpkin spice cake, with cream cheese icing, vanilla cake with vanilla buttercream, and chocloate cake with chocolate buttercream. I also made the sweets for the dessert table with a little help from family and friends. I made spiced caramel apple cupcakes, vanilla cake balls, and chocolate covered Oreos, dressed like bride and groom. My mother-in-law made chocolate peanut butter fudge, and my sister-in-law made chocolate chip cookies. Yum! Hope you enjoy!
Here is the dessert table set-up! My wonderful husband made the extremely tall candles by taking table legs and attaching plates to the top, and then spray painting them black.

I wanted the flowers on the cake to represent the colors and flowers in my bouquet. I think I did a pretty good job matching the colors!
The wonderful hubby made the topper out of clay with the matching monogram from the lanterns. Underneath the topper we put battery operated tea lights so it would light up!
Lastly, we made 100 caramel covered chocolate covered apples for all the guest to take home as their favors. I think that they were a big hit! Here is the display table where we had the seating tags and the favors all lined up.
The sign says, Don't Forget: One last treat for being so sweet!
I hope you enjoyed the sweet side of my wedding! 

Wednesday, June 8, 2011

And The Winner Is.....

The winner of the two books by Debbie Brown is...

Random Integer Generator

Here are your random numbers:
1
Timestamp: 2011-06-08 12:54:11 UTC


Congratulations to Cupcations! Her comment number #1, was chosen as the winner!
Thanks to all that entered!
* Full disclosure I was not sure how to get the random.org generator box to show the winner so I went with this method!
*There will be another giveaway coming up soon so watch out for it!

Monday, June 6, 2011

Sweet Fall Wedding!

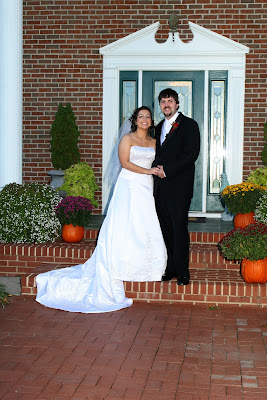
So I am very excited to share this wedding with you, because it is my own wedding. Since there are so many details to share with all of you, I will break it up into a couple different posts. The second post will feature all of the yummy desserts and favors that I made for the wedding. So without further ado, I hope everyone enjoys a glimpse at my wedding!

We decided to have our wedding at a Bed and Breakfast that was on the water. Since I am from Maryland I wanted to be able to have pictures on the water, but I didn't want to get married on the beach, I think this place worked out perfectly.


 This is the ceremony site all set-up before any guests arrived. The ceremony was held outside under the pergola and the reception was held inside a beautiful rustic barn.


 The place was so large we had to use golf carts to get from the water to the reception site.
My husband Jason and I did a lot of DIY projects to add special touches to the wedding. Jason made six lanterns, which we sprayed black and placed etched glass inside. I etched each piece of glass with our initials. I think that they turned out great! We hung them from the tree outside of the reception area, where cocktail hour took place.
 Here is the tree lit up at night!
 I decided to be different and make a wedding menu! We bought a three-pane window and sprayed it with chalk spray paint. I then listed the appetizers, dinner, and dessert options in each of the panes.This menu was set-up right outside the reception area where the cocktail hour was held. We also brought in all of the hay bales, pumpkins, and mums to decorate the Inn.
 For the guestbook, i bought an old typewriter and place paper in it for the guests to type their well-wishes to us. We also took photos of our parents and grandparents weddings to display in the table. If you look closely you can get a glimpse of our dessert table.

 We had our centerpieces made by a local blown glass artist! Each pumpkin was slightly different and unique. We gave them as gifts to our wedding party. I love the way they turned out! We also had our champagne flutes made out of hand-blown glass to match the decor.


 I hope you enjoyed this look into our wedding! Stay tuned for when I share all of the yummy desserts we had to offer. Also, don't forget that our giveaway ends tomorrow, so, enter now if you haven't already!