Wednesday, October 15, 2014

New Storefront and Progress Photos

So in case you don't follow me on Facebook, I wanted to share with all of you that my dream of having my own storefront bakery has finally come true. This has been in the works now for a few months but, we finally made it official and signed the lease. The bakery will be located in Bel Air MD, on Main St. We could not be more excited for the next chapter of Sweet Eats Cakes! I can't wait to open and start sharing all of my yummy treats with the community.
 
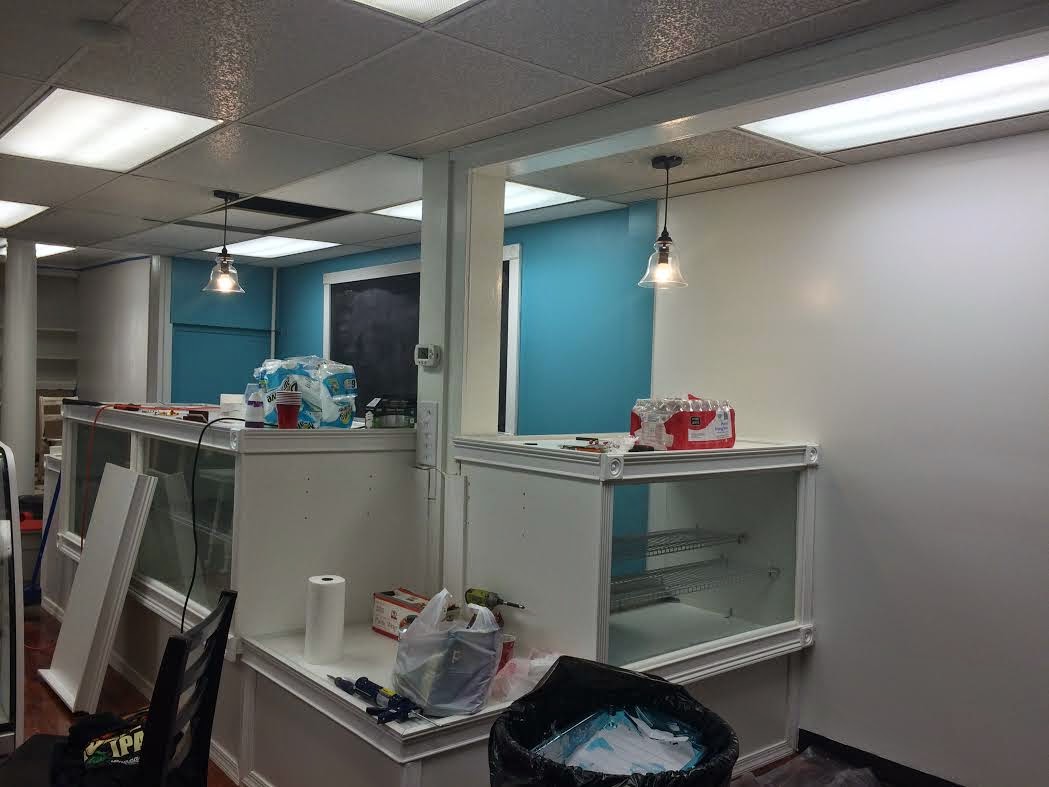
So I thought I would share some progress pictures with all of you. We were really lucky and have moved into a space that is practically move in ready. Just needs a little paint and some elbow grease and it should be ready in no time.


Aren't the floors to die for!


Going Blue!


New lights hung.


We are hoping to open by the end of the month! I am so excited to see how the business will grow from here! Thanks for all you support and love over the years! Wish us luck and we hope that if you are local you will swing by and check us out once we are open!

Tuesday, September 23, 2014

What to do in a Cake Crisis

Hello long time no talk. Today I wanted to share a little story that happened to me over the weekend on one of my deliveries. This weekend was crazy busy for me with lots of weddings and desserts to deliver. So I guess I will start off with some happy things like pictures of desserts and then I will get to my Sunday delivery crisis.


 Love this dessert table set-up


Sundays wedding was in Mt. Airy Maryland which, is about a 1 hour and 20 minutes delivery so we decided to start off early to make sure we had plenty of time to get to the venue. You never know what could happen especially with traffic. It is a very good thing we left so early because about 3 miles from the venue our SUV decided to just stop working. It completely shut off while we were driving. I kind of started to panic because it was over 80 degrees that day and the car started to heat up pretty quickly. Luckily, I had the number of the planner with me so I arranged for someone to come get us so we could deliver the desserts.
 
We managed to transfer everything into the caterers truck and get it delivered before everything melted in the heat. It is a good thing we left early because otherwise I am not sure we would have made it. I will admit that it was a very stressful situation but I I think we handled it well and the couple knew nothing about the small crisis going on behind the scenes. 


I always make sure to have the venue contact info along with the person in charge of the weddings info  just in case something like this could happen.  I will admit that it was slightly embarrassing to have to call for a ride but, you have to do what you have to do. If we had been any farther from the venue my plan of action would have been to rent a vehicle to get the cake to the venue. Things like this happen but you need to make sure you remain calm and think clearly or at least have someone with you who can do that for you.
 
In the end our car didn't make it and we put it to rest. It has been a great delivery vehicle but, now we need to find something more reliable for the future.
 
 
So until next time happy caking!
 
Have you ever had a cake crisis? How did you handle it?

Thursday, July 17, 2014

How to Pipe Peacock Feathers

So it has been so long since I did a blog post but life and the business has been busy and it is only getting busier. I wanted to share a recent cake I made with you guys and show you how I accomplished the look if piped peacock feathers.


This cake was a slight challenge for me since I wasn't sure what to pipe the feather on with buttercream or royal icing. I started with royal icing because it gave bright vibrant colors but ended up going with buttercream because I wasn't achieving the look I wanted with royal.


I made a template for how I wanted the center of the feather to look and traced it onto the side of my cake.


From there I started to build my feathers with color based on how the actual feathers look.


The centers of the feather can all be different so just mix of the shape and symmetry of the centers to achieve a more realistic look.


I piped in a tan buttercream for the middle part of the feather and later went back and painted it gold to give the feather more of a pop.


After I had filled in the feather with color I took a skewer and drag lines through the feather to make it appear more realistic.


Then I started to add the tendrils that make a peacock feather come to life. You can be pretty free flowing with this portion since no two feathers are the same.


I was really happy with how the finished cake turned out. I think the feathers look very realistic and beautiful for the side of a wedding cake. (Sorry about photo quality it is very hard to snap a good photo at this venue).


So in the future if you want to pipe feathers instead of painting them I hope this little tutorial will help with that. I will try to get some more posts up in the coming weeks. I just have to find the time in the schedule. Thanks for reading!

Monday, May 19, 2014

Cameron's Elephant Themed First Birthday

I wanted to share this super sweet elephant themed birthday party. The party was for Amber's second son Cameron's first birthday! if you have been following the blog for any amount of time you will know that I have made all of Amber's first sons cakes and so the tradition continues and I could not be happy to be a part of it!
Amber wanted an elephant themed party in light blue, gray and white. She picked the desserts she wanted and allowed me to decorate them in the corresponding theme. I also made the backdrop and hanging tassels for the table.


The cake was buttercream with an edible mini elephant on top.


I made a set of cookies to match the theme.


Cupcakes were made by Amber with cute elephant toppers!

 Other desserts included cake pops, raspberry and pineapple cheesecakes and chocolate covered pretzels. 


Amber always does a fabulous job decorating and adding special touches to her kids parties!


  Happy family!

Happy Birthday Cameron! I hope it was a special one for you! Special thanks to Amber for the pictures and  for letting me be a part of his little mans day!

Monday, May 5, 2014

Mother's Day Cupcake Bouquet Tutorial

With Mother's Day quickly approaching I wanted to share this super sweet and easy cupcake bouquet tutorial that any mother would love! 
So first up you will need the following items to make your cupcake bouquets. 
  • Terracotta pot
  • Acrylic paint
  • Paintbrush
  • Mini cupcakes
  • Toothpicks
  • Styrofoam ball
  • Icing in different colors
  • Piping tips Wilton 2D, Bakery Crafts 68, Wilton 32, Wilton 352
  1. Start by having child(ren) paint a fun design on the pot for their mother. After the pot has dried seal pot with clear acrylic sealer.
  2. After the pot is completely dry insert Styrofoam ball into pot. You want about half the ball to stick out of the pot so you may attach the cupcake flowers.
  3. Ice the cupcakes to look like flowers using assorted tips.
  4. After cupcakes are iced apply cupcakes to Styrofoam ball using toothpicks. You may need to use more than one toothpick per cupcakes. Try to get the cupcakes as close as possible to avoid to many large gaps. 
  5. Use the Wilton 352 leaf tip to fill in any holes between cupcakes and present to Mom!
  6. After the cupcakes are consumed Mom can use the pot for planting her favorite flower (that you also bought her for the occasion)!


  7.  He has no idea what is happening to him!
     My little helper loves to bake!


How to Ice Cupcakes
  • Rose
Start with a piping bag filled with icing color of your choice and the Wilton 2D tip. Start with the tip in the center of the cupcake and apply pressure. Swirl the design outward to complete the rose. 


  • Mum
Start with piping bag filled with icing color of your choice and Bakery craft tip 68. Place tip on the outer edge of the cupcake and apple pressure and pull away to make a petal. Continue around the cupcake to complete one row. Once first row is complete pipe next row directly on top until the entire cupcake is covered in petals. 


  • Ball Flower
Start with piping bag filled with icing color of your choice and Wilton tip 32. Place tip on outer edge of cupcake and apply pressure to make a small dot of icing. Continue applying dots around cupcake until entire cupcake is covered. 


Have fun with this project! If  you do not have certain tips or piping bags don't worry cupcakes do not have to look exactly like a certain flower to look nice.